Imaging Design

As part of the „Drone Flying & Phototechnical Development“ module, we learned not only how to fly drones, but also the legal and technical requirements for operating unmanned aircraft systems (UAS).
In order to successfully complete the semester assignment, it was necessary to obtain the A1/A3 drone licence.
The semester assignment involved the development of a flight concept, followed its practical implementation during flight sessions.
Legal and Technical Aspects:
Before moving on to the practical part of this lecture, our lecturer provided comprehensive information on the legal requirements and technical functionalities of drones. This knowledge was essential for obtaining the A1/A3 drone licence, also known as the EU Competency Certificate. The pilot registration was carried out the German Federal Office of Civil Aviation (LBA).
The legal requirements covered aspects such as drone registration, liability insurance requirements, aviation regulations including maximum flight altitudes and no-fly zones, privacy regulations when using sensors to collect personal data, and Visual Line of Sight (VLOS) regulations. These elements are critical to ensuring the safe and responsible operation of drones.
In terms of the technical characteristics of a drone, we gained a thorough understanding of how rotors work, including the underlying physical principles that govern the direction of motion. The main components of a drone were also explained, along with relevant limitations such as flight time, speed, Visual Line of Sight (VLOS) and the impact of weather conditions. Special attention was given to the correct setting of the return home function (RTH), different flight modes and maintenance aspects to ensure smooth operation.
The theoretical part of the course was followed practical test flights, initially using the DJI Flight Simulator. This tool was instrumental in deepening our theoretical understanding and developing a better feel for the drone. In particular, navigating in different directions and rotating around axes required constant concentration and patience.
Planned concept:
Although we had outlined the concept prior to the flying sessions, it was refined during the actual flying sessions. This allowed us to gain a comprehensive overview of each group member’s flying skills and to adapt the concept in a modular way.
We developed the concept collaboratively, incorporating input from each group member, and then finalised it in the form of a storyboard. This more flexible approach proved to be the right choice for our group.
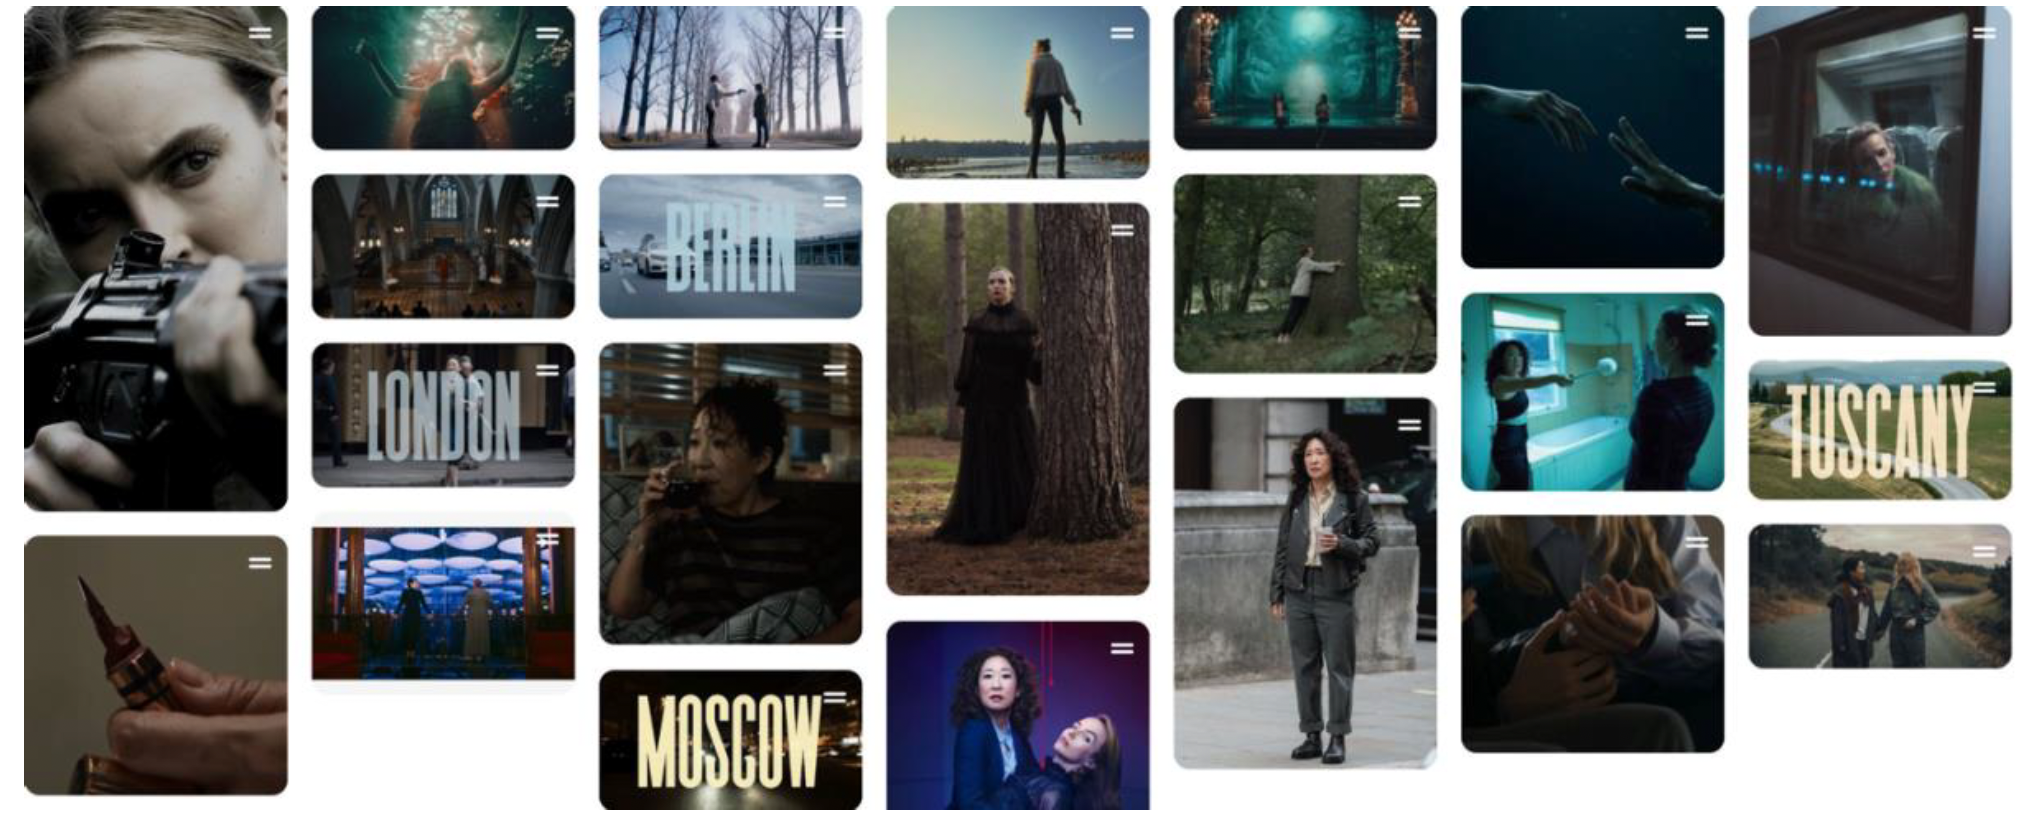
Inspired the series „Killing Eve“, our film idea was based on a thriller-mystery atmosphere.
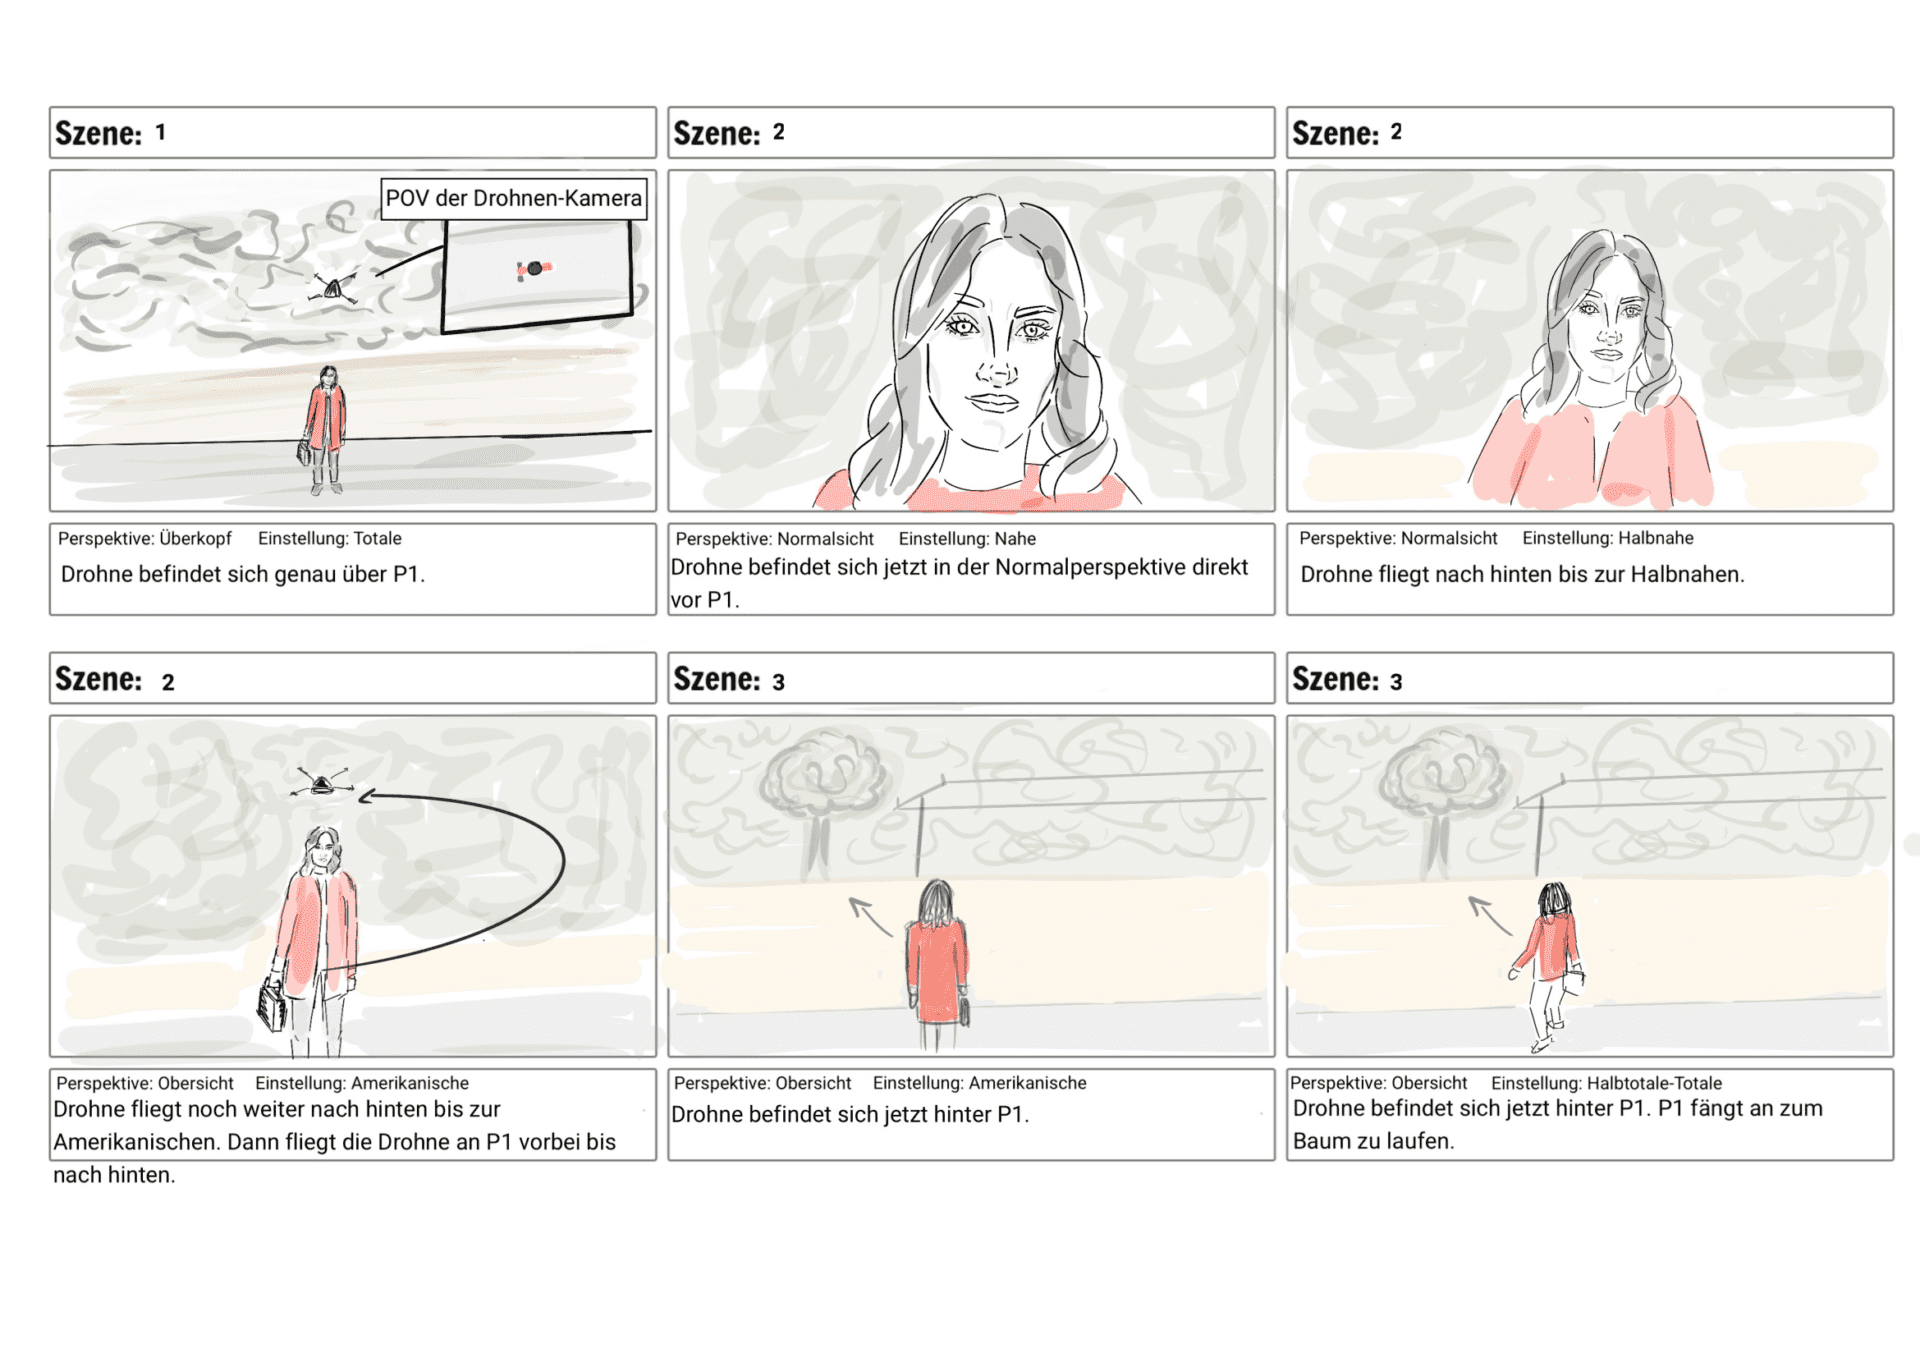
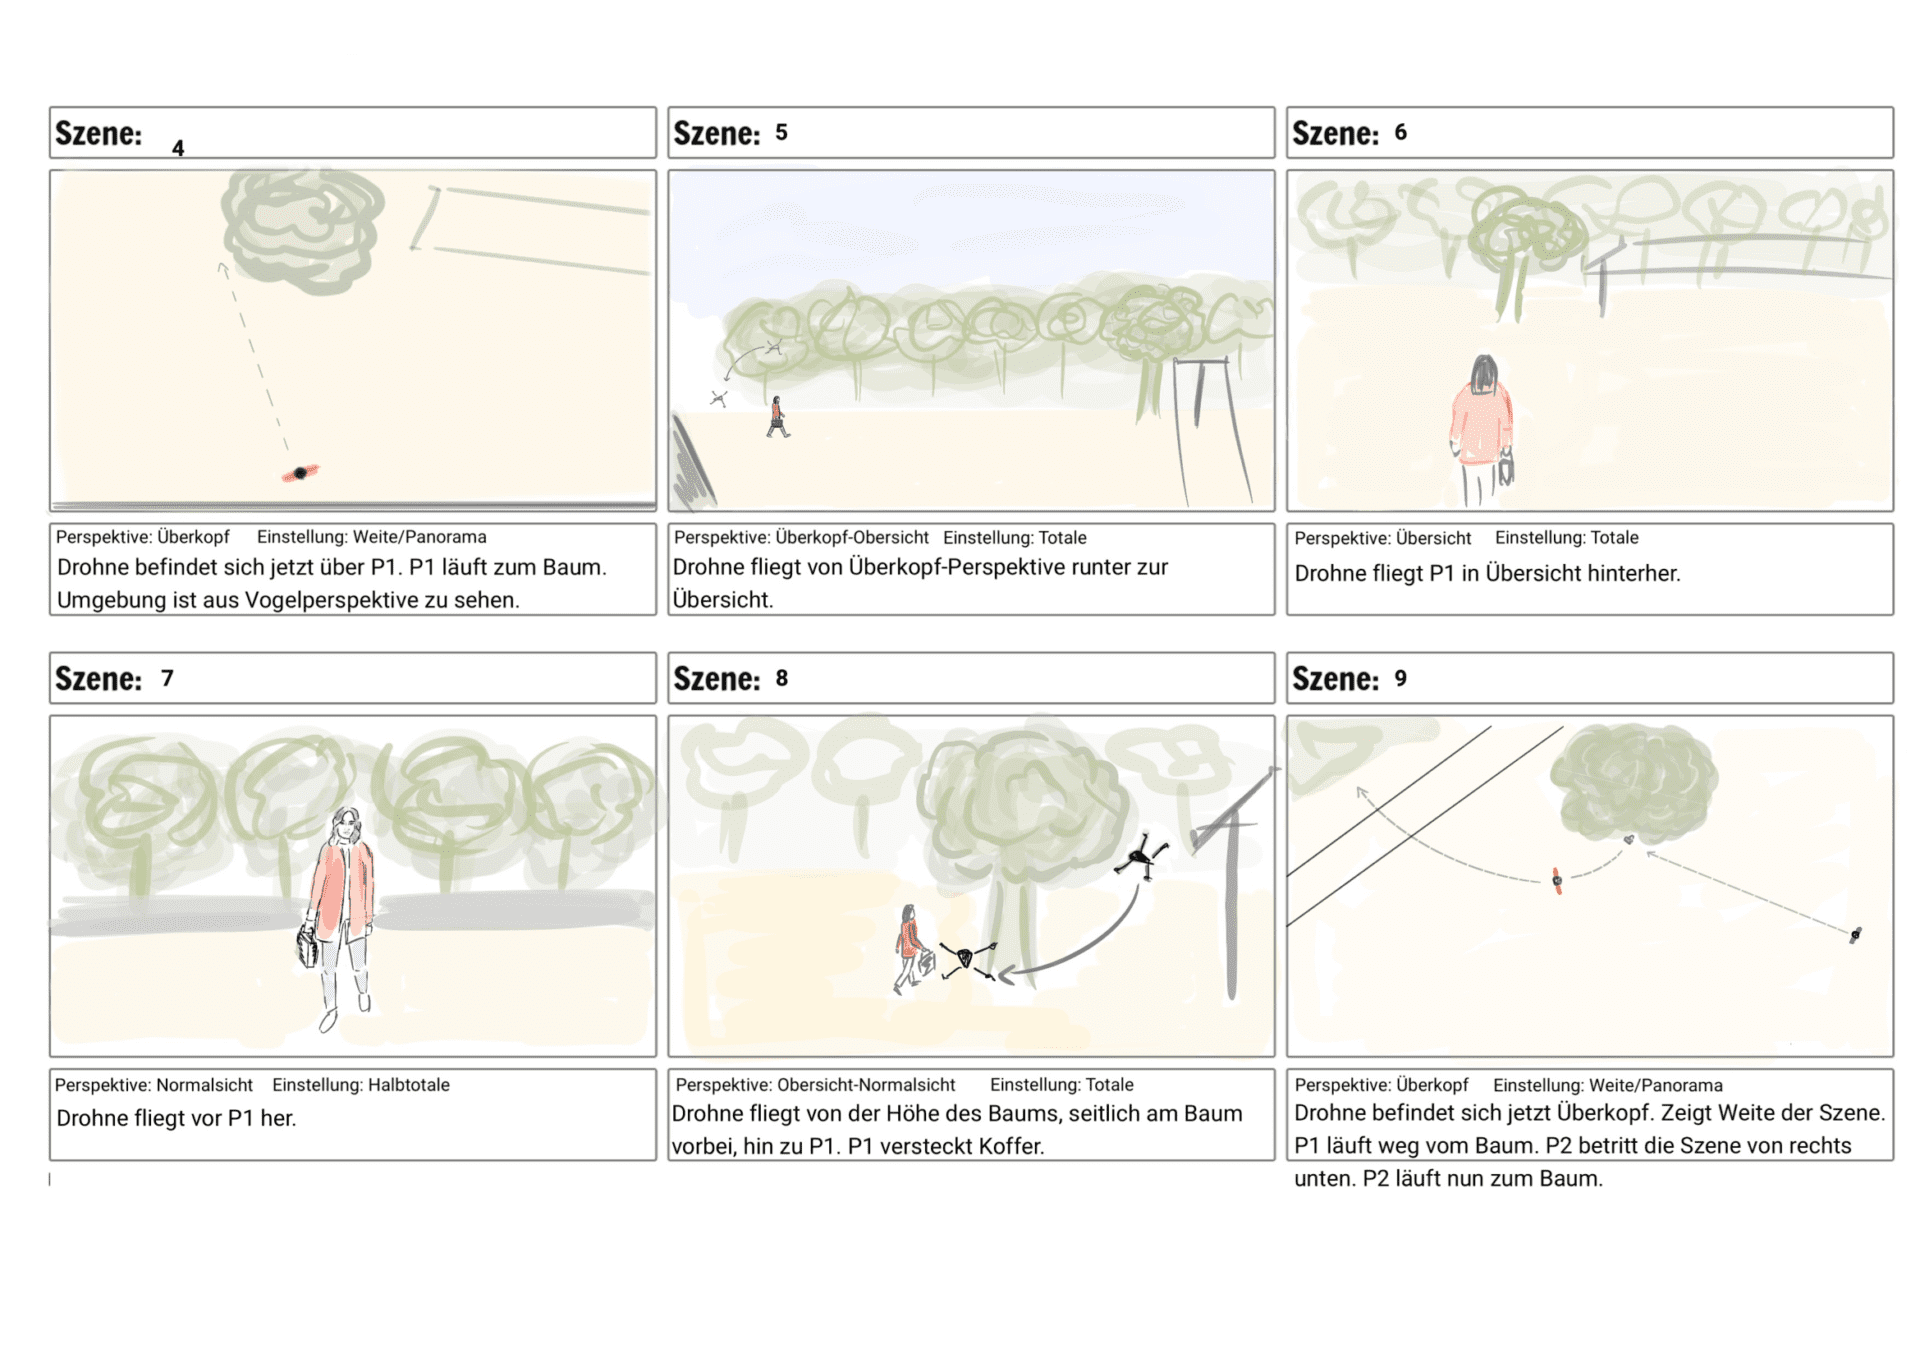
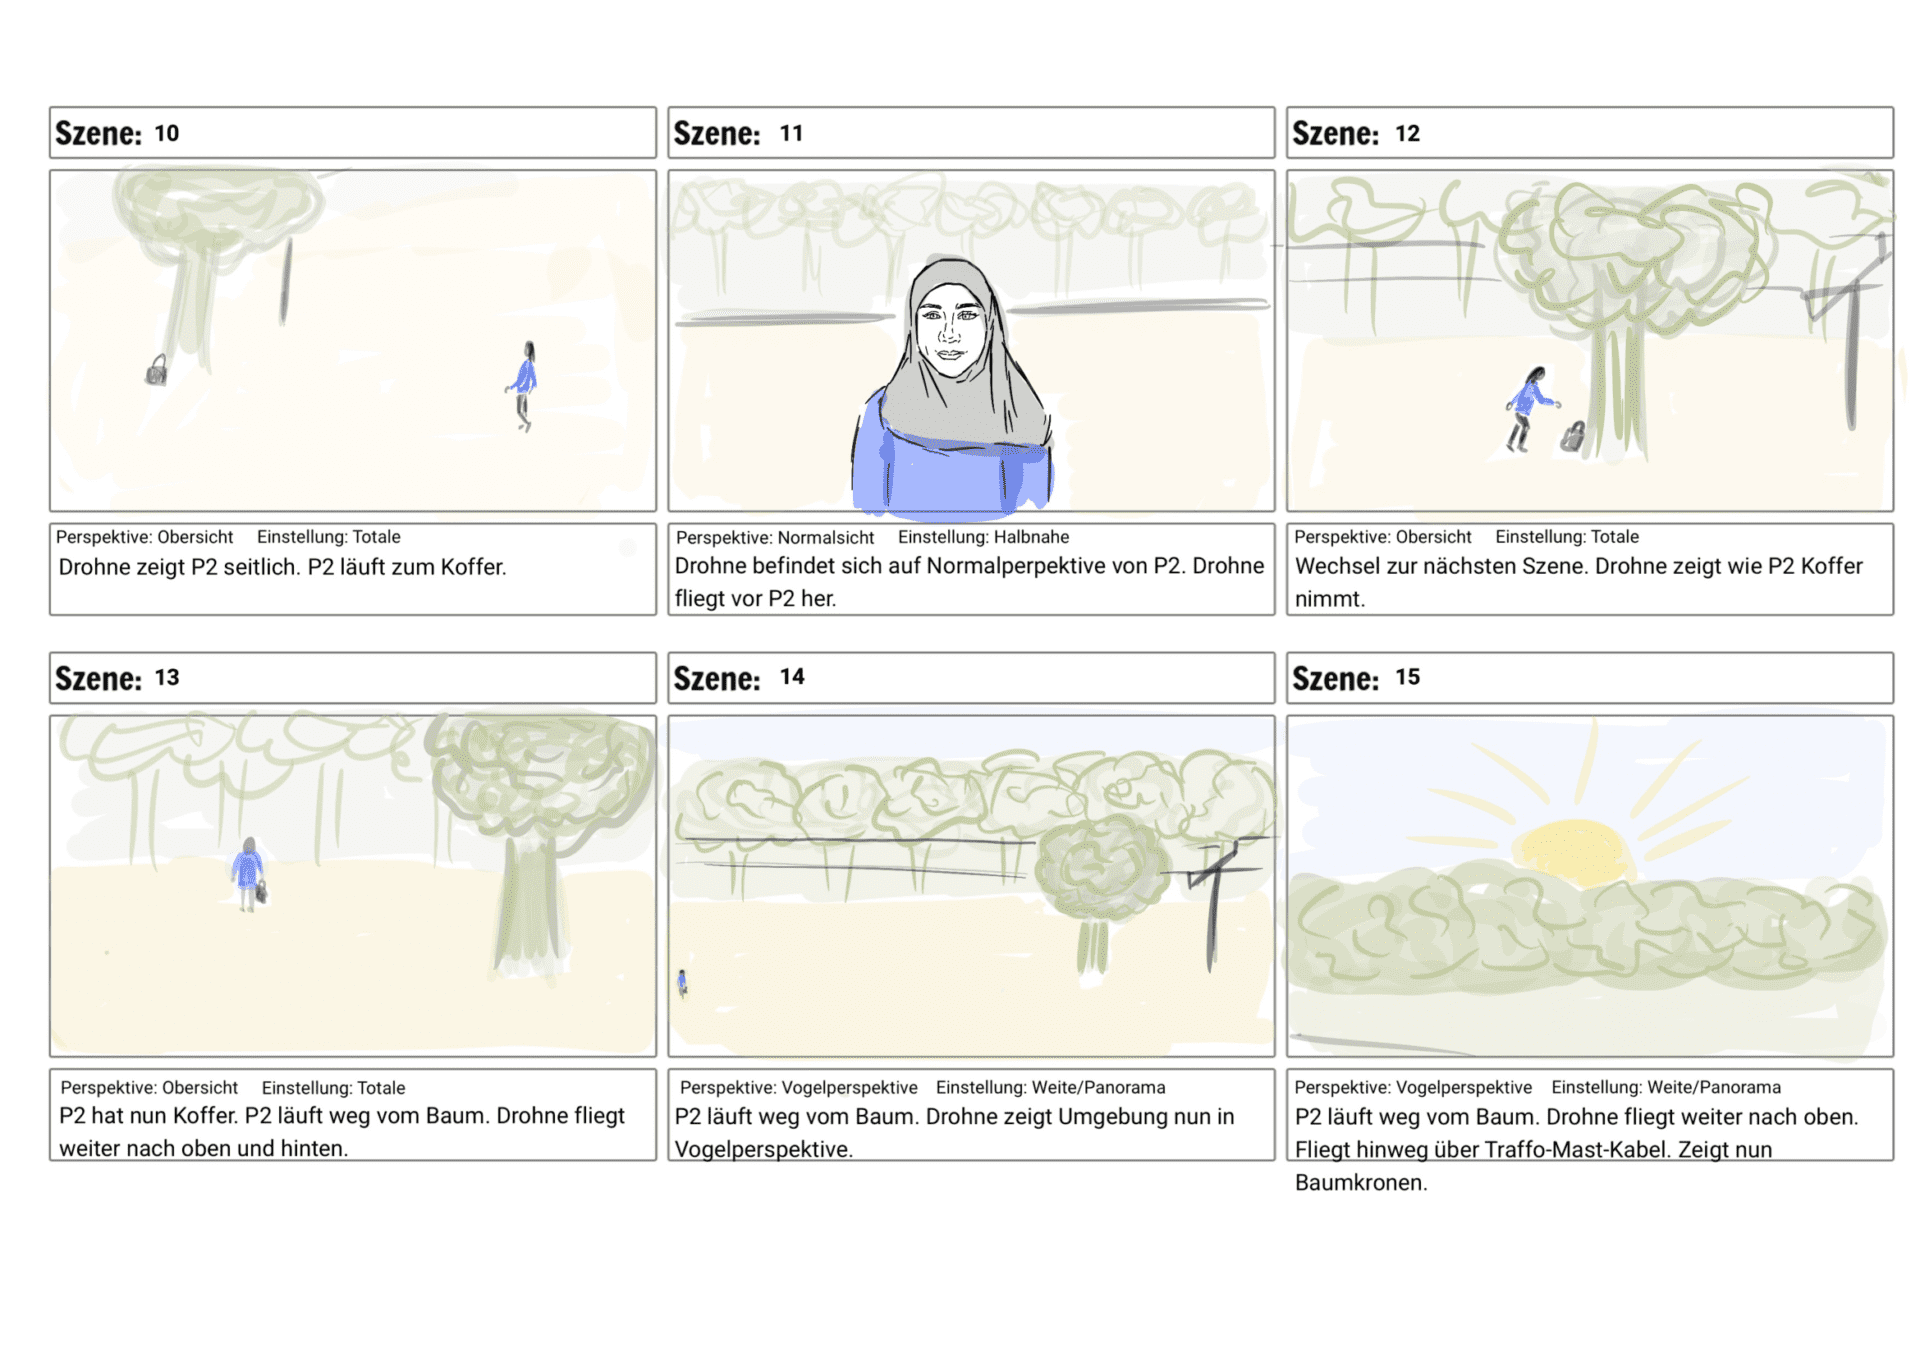
In our film, two female protagonists exchange a suitcase of unknown contents in a field. The motivations of the protagonists are not revealed to the viewer, which is intensified the film’s open ending. To create atmosphere, we worked with different camera angles, such as establishing shots to introduce the scene. We also used a variety of close-ups to show the emotions and state of mind of the protagonists.
Technically challenging were shots that required not only navigating the drone in different directions, but also combining the drone’s rotation around its axis with simultaneous camera pans.
Implementation:
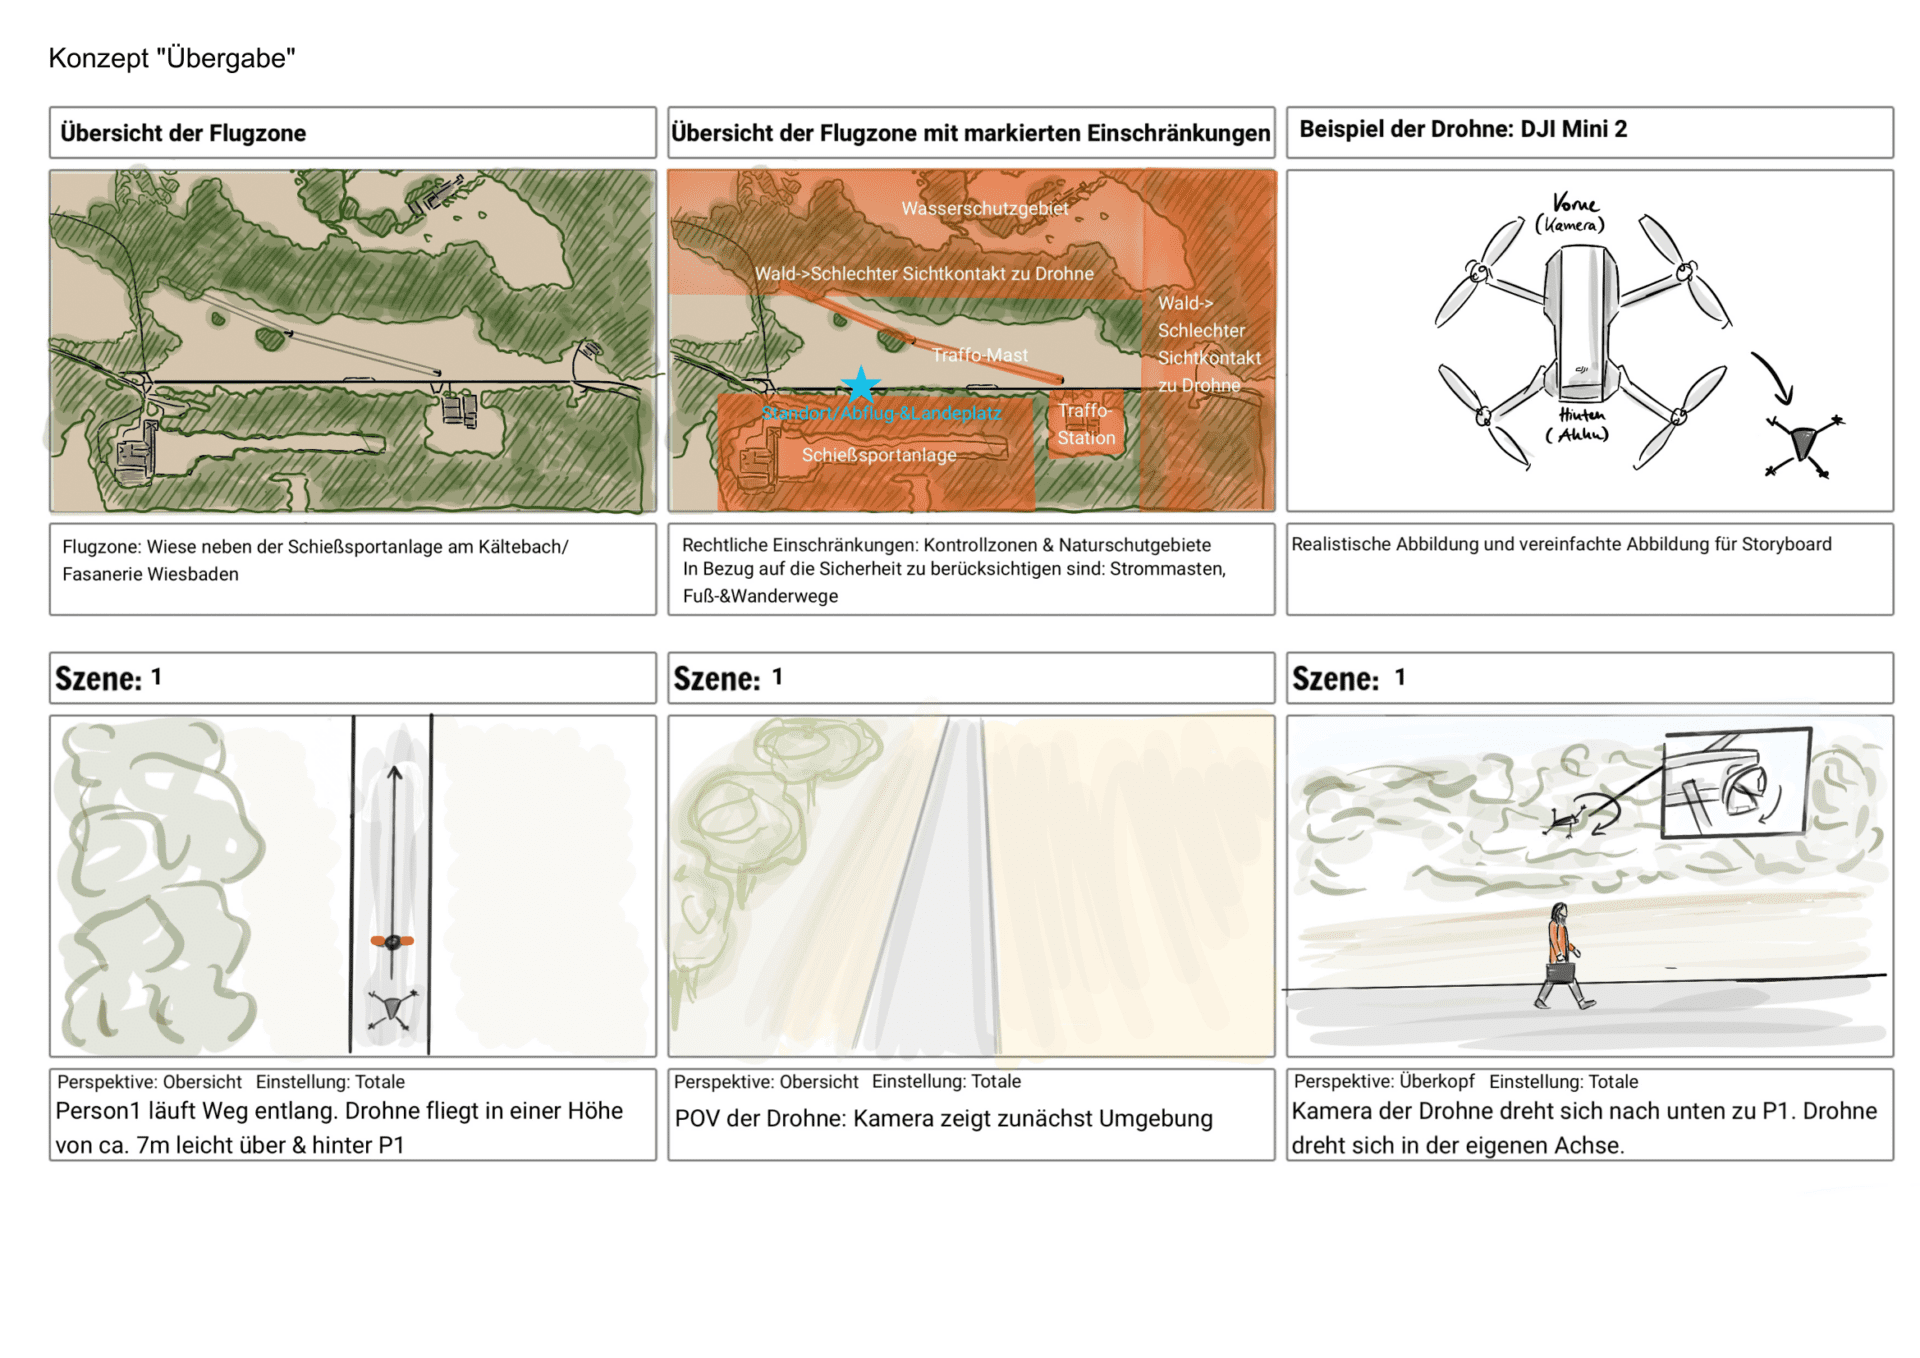
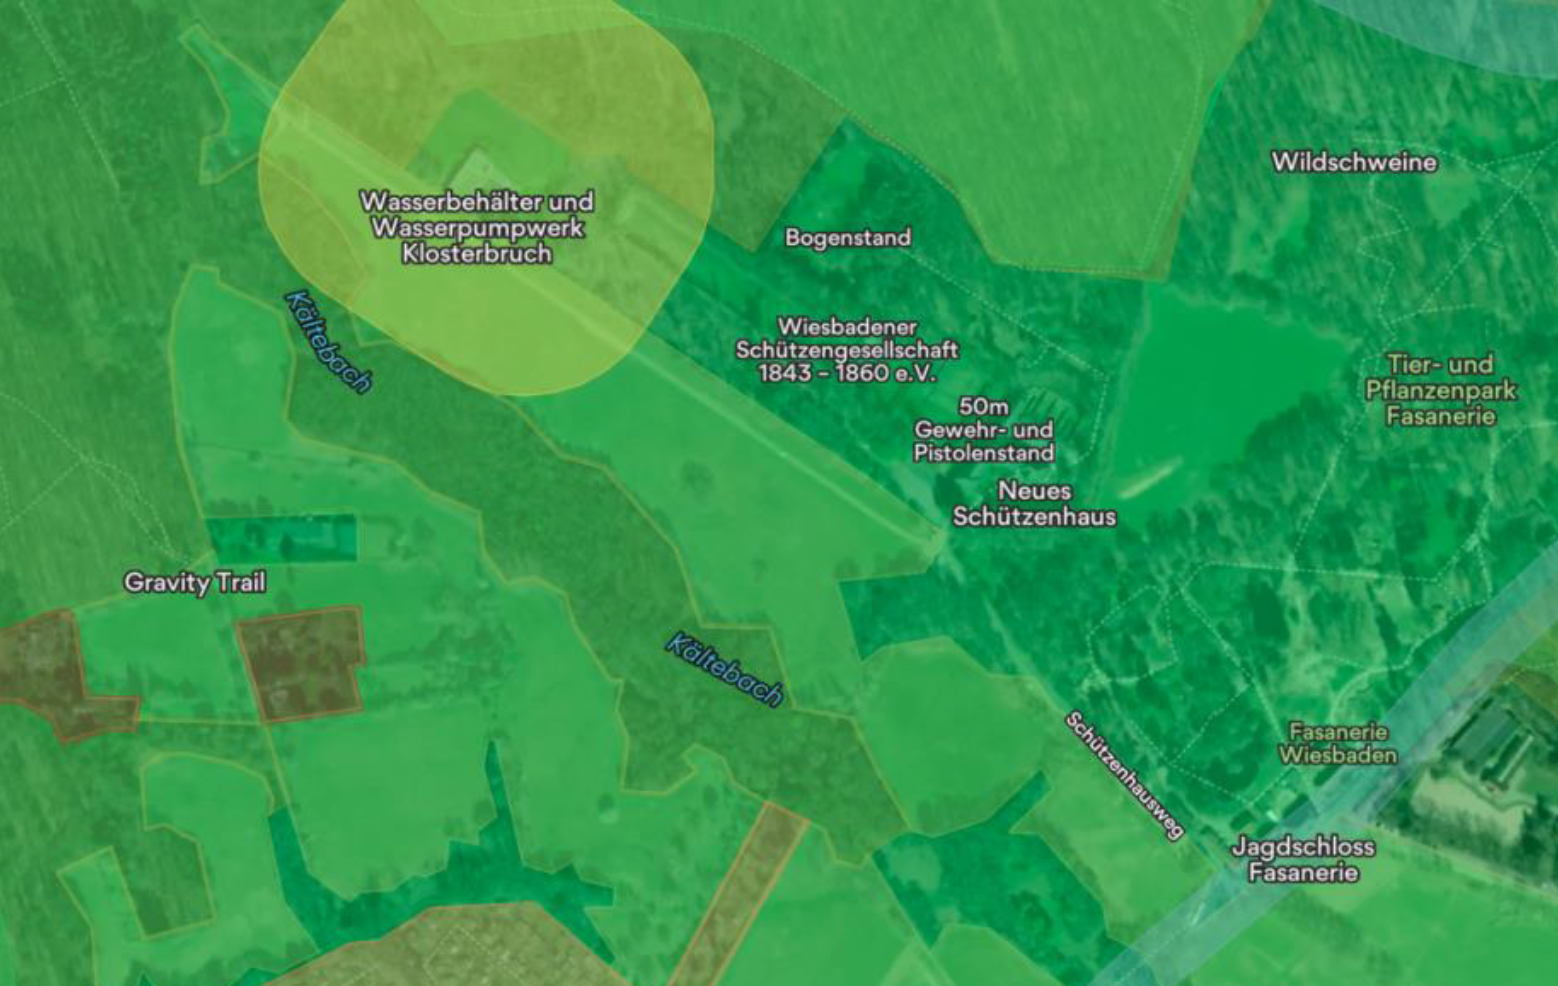
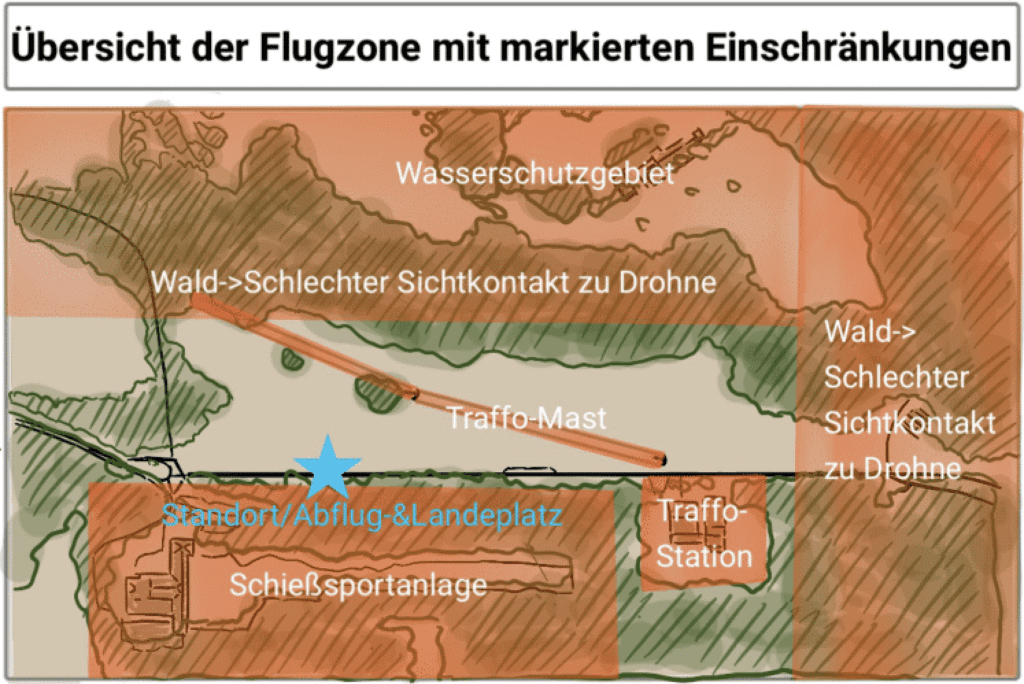
To bring our final concept to life, we used practical flight hours under the guidance of our lecturer, which served as trial sessions to strengthen our skills. However, the actual execution took place outside of the university context. After borrowing the DJI Mini 3 Pro from our university, we worked as a group to schedule a suitable filming date. We chose the field next to the shooting range at Kältebach/Fasanerie Wiesbaden, the same place we used for our flight training sessions. This choice made it easier to check the local legal framework.
However, we still used flight zone apps such as Droniq to double check the flight zone. We were already familiar with the security risks and the movement of people in the area from our flight training. Special attention was paid to the private property of the shooting club/range, the Flora-Fauna-Habitat (FFH) close to our launch site, individual residential properties, isolated trees in the field and a transformer station with a pylon spanning the entire area of the field. Also, the continuous line of sight according to VLOS to the drone had to be considered.
Once we had all the information about the environment, we checked the weather forecast, which predicted cloudy to variable weather. This was not ideal for drone flying and the drone’s sensors, but proved beneficial for the atmosphere of our film.
The next step in completing the pre-flight checklist was to check the drone. We checked the drone and propellers for any damage. The camera lens was checked for dirt. The drone’s individual batteries and the controller were fully charged.
We then started the drone, connected it to the controller and formatted the SD card.
In terms of camera settings, we filmed at 25fps with a shutter speed of 1/50 and an initial ISO of 200, which we had to adjust during the shoot due to changing weather conditions. We also switched ND filters between 16 and 32, depending on the amount of sunlight.
After everything was set up, we could start our shoot. Each of us felt capable of flying the drone (self-assessment) and was well-prepared. To reacquaint ourselves with the drone’s flight behavior and controls, each of us flew a few routes at the beginning. To achieve the best results for each scene, we selected the person who flew most confidently during the previous trial flight.
We consciously chose not to use flight modes to maximize the learning effect.
Throughout the shoot, there was always a spotter on-site, informing the drone pilot about the drone’s exact location and any changes in the surroundings, such as pedestrians or protruding branches of trees, etc.
The well-crafted storyboard greatly facilitated the filming process.
In contrast to static scenes where the drone simply establishes the scene from a fixed perspective, dynamic scenes were challenging for us as beginner drone pilots.
The changeable weather and cold temperatures were also a challenge, causing the batteries to drain quickly. Therefore, we shot scene scene, regularly monitoring the battery status and the drone’s condition, especially when it started to drizzle. After each landing, we dried the drone and changed the battery, which we always carried close to the body to prevent rapid battery discharge and maximize the charge capacity.
This regular drone and environmental monitoring also prevented potentially risky situations, such as forcing a return-home or colliding with random and unintended sources of danger (SAFETY).
Despite the weather-related restrictions on the first day of shooting, we were able to implement more than half of the storyboard. The second shooting day took place a few days later. By the second day, we were already more skilled and confident in the control of the drone, which sped up the filming process. After nearly 2 hours, we had completed the entire storyboard.
Aside from these minimal restrictions, the shoot went smoothly and was enjoyable for our group.
Subsequently, we transferred the footage to a laptop and shared it with all group members via WeTransfer. Afterward, the editing and post-production of the material took place.
Editing and Post-Production
The first step was to review all the footage. As some scenes were shot several times, it was necessary to select the best shots.
After reviewing the footage and selecting the best scenes, the editing process began. I used Adobe After Effects for editing and post-production as I was most familiar with this tool as media designers. First, the shots were arranged in the correct order according to the storyboard within the rough cut. Some scenes had to be cut because the drone’s manoeuvres lingered in a static position for too long, resulting in noticeable cuts in the film. To counteract this, I tried to create a harmonious image through scaling and axis adjustments. Overall, I had to increase the pacing of all the scenes, as the drone shots took longer in reality, which reduced the tension of the film.
For example, the transition from scene 5 to scene 6 was achieved using a smooth camera pan to create a natural transition between scenes.
Cinematically, I was inspired the visual style of the Killing Eve series.
A mood board was created with clips from the series to help me with the colour grading. „Killing Eve uses rich, intense colours with a tendency towards bluish tones to emphasise the cool, sterile look of the psycho-thriller. Despite the saturated colours, the scenes sometimes appear almost lifeless.
I used a variety of effects including Lumetri Color, exposure adjustments and photo filters to achieve a cohesive look inspired the series.
Color grading proved to be a particularly time-consuming part of postproduction, as each scene had to be edited individually, and a simple transfer of settings from one scene to another was not possible. This was mainly due to the changing weather conditions and filming on two different days.
To complete the overall look and feel of the video, we added music from the series. Four different tracks were considered, all fitting well with the video but bringing different moods and narratives.
Our final choice was the track „Killer Shangri-Lah“ Pshycotic Beats, as the music adds another layer to the storytelling.
I also used a different track („Cat’s Eyes – ‚Girl In The Room'“) for the fade-out of the film to create a break in the narrative structure of the film, similar to what the series regularly does, and to end the film on a more hopeful and mystical note.
The timing of the video had to be minimally adjusted afterwards due to the soundtrack. I also added text layers at the beginning and end of the film as a stylistic element.
Finally, I rendered the finished video in HD 1920 x 1080px at 25fps as an mp4 file.